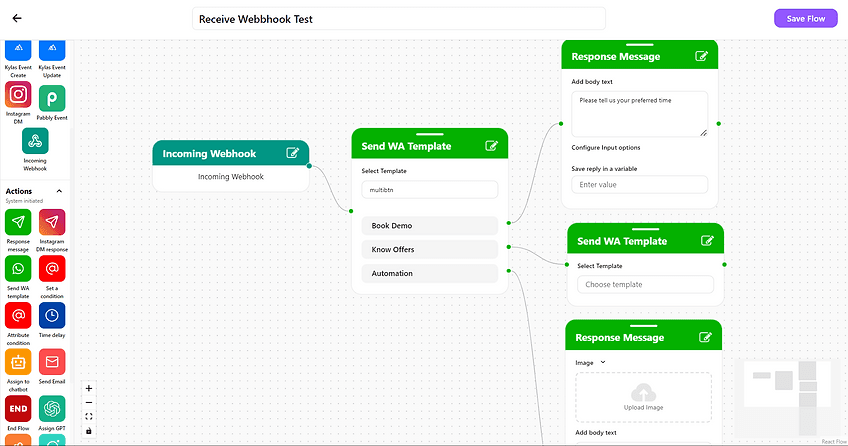
In Cheerio's workflow builder. now you send and receive a webhook using two new workflow nodes (Incoming Webhook, Webhook Trigger). Let's first understand how an incoming webhook node works:
To receive an incoming webhook trigger
You have to add your Cheerio API key which you can generate from the manage profile section by clicking on your profile to your curl.
You have to add your workflow ID, which contains the "incoming webhook node" to your curl. Here is a sample preview of a workflow ID
3. Once you have added these two things to your curl. Cheerio will start receiving your Webhooks. 4. Add any desired action that you would like to trigger when a webhook is received
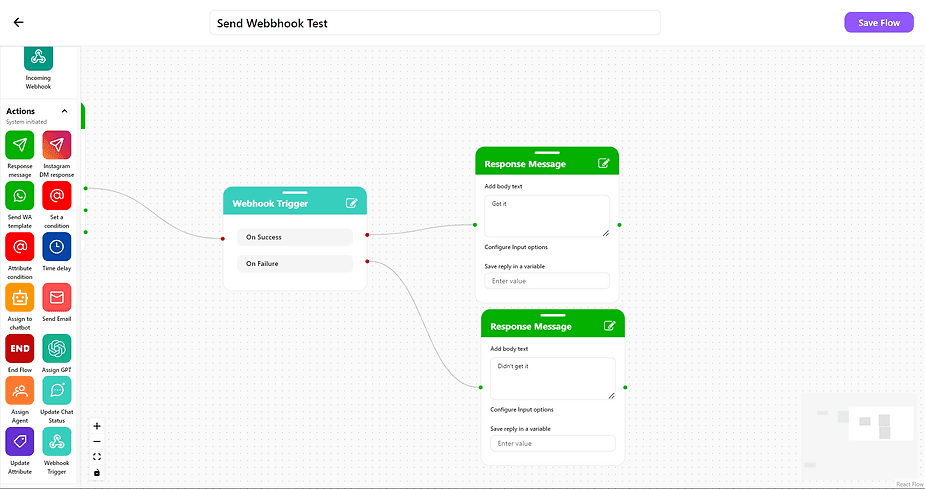
To send a webhook trigger
To send a webhook trigger you have to use the webhook trigger node from the actions.
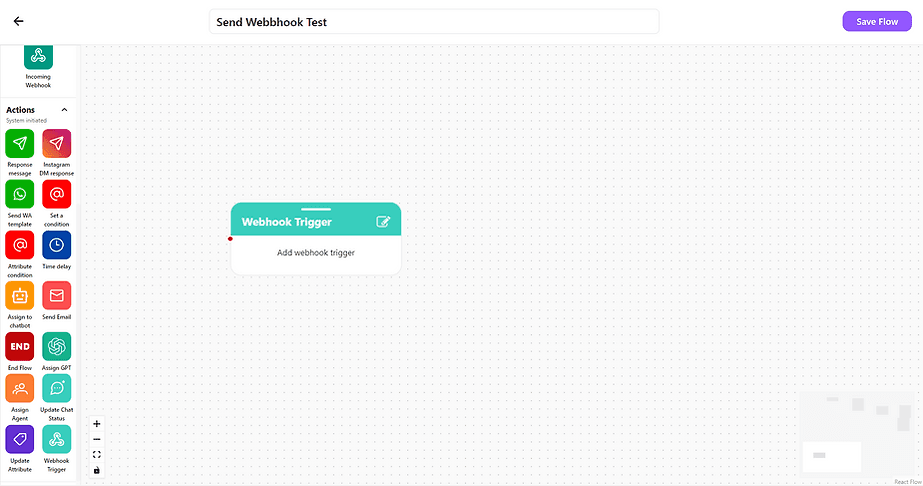
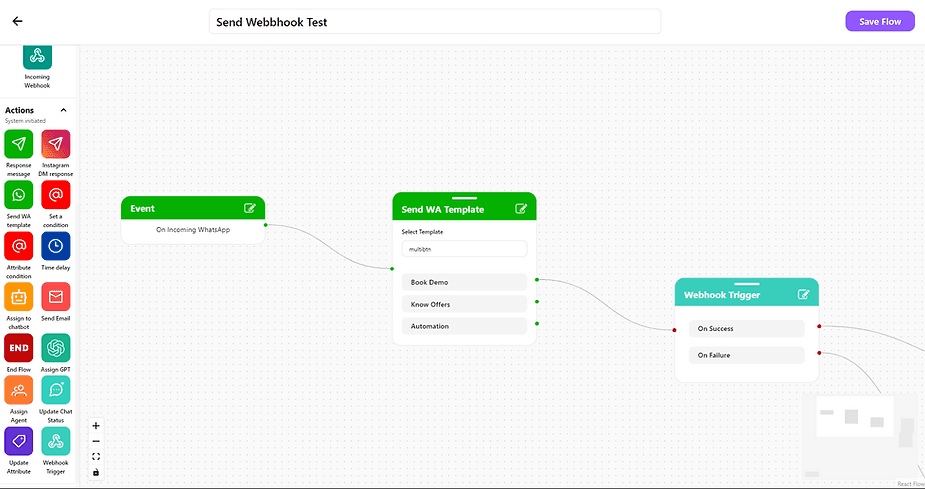
2. Create a desired workflow and add a webhook trigger node whenever you want to send a webhook.
3. Click on the edit icon on the webhook trigger node to set parameters.
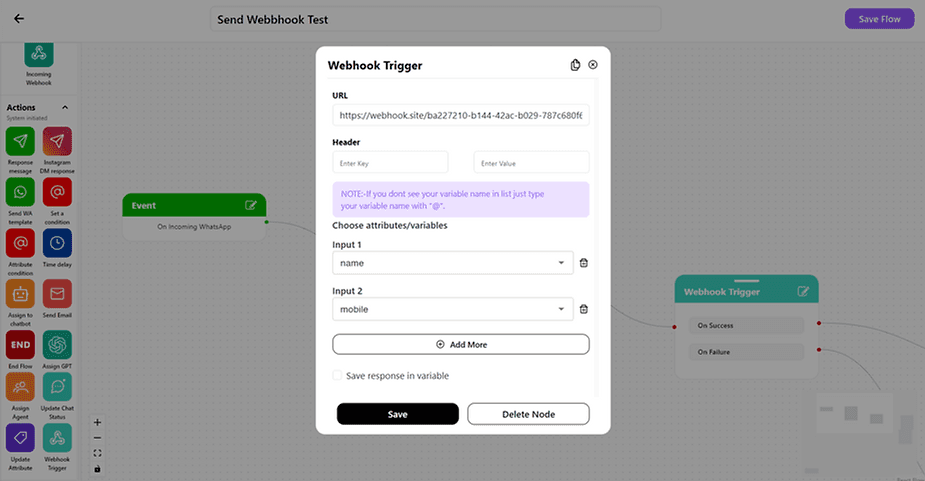
4. Set the URL where you want to send your webhook and Header & its value if required.
5. Add custom attributes/variables that you would like to send with webhook & hit Save
6. Set a desired action for response's success and failure
That's it. In case you still have doubts or requires reach out to us support@cheerio.in


