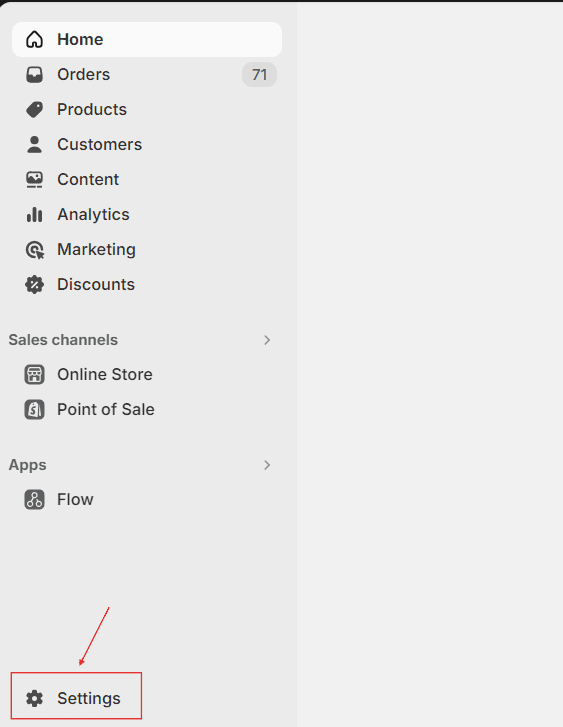
1. In Shopify Store, go to Settings at the bottom left section
First, open your Shopify store & click on Settings at the bottom left of the screen.
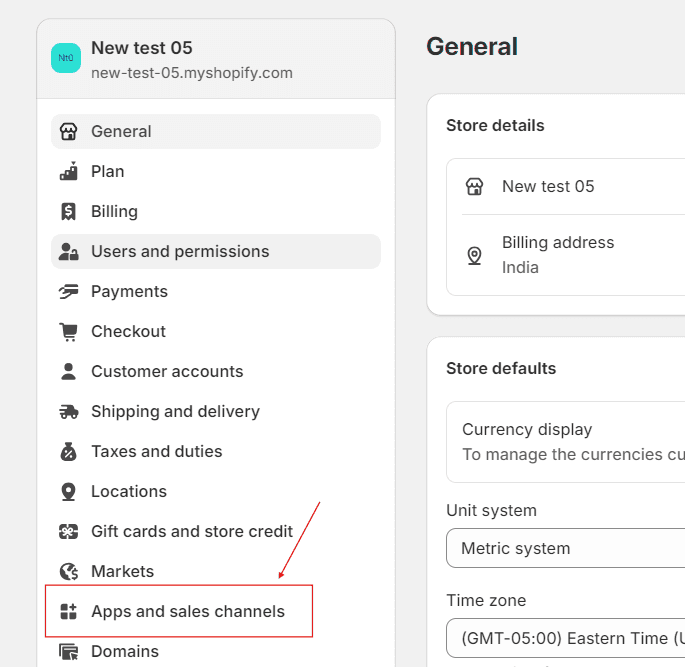
2. Click ‘App & Sales channels’
In the Settings Sidebar Menu, open the App and sales channels as shown in the image below.
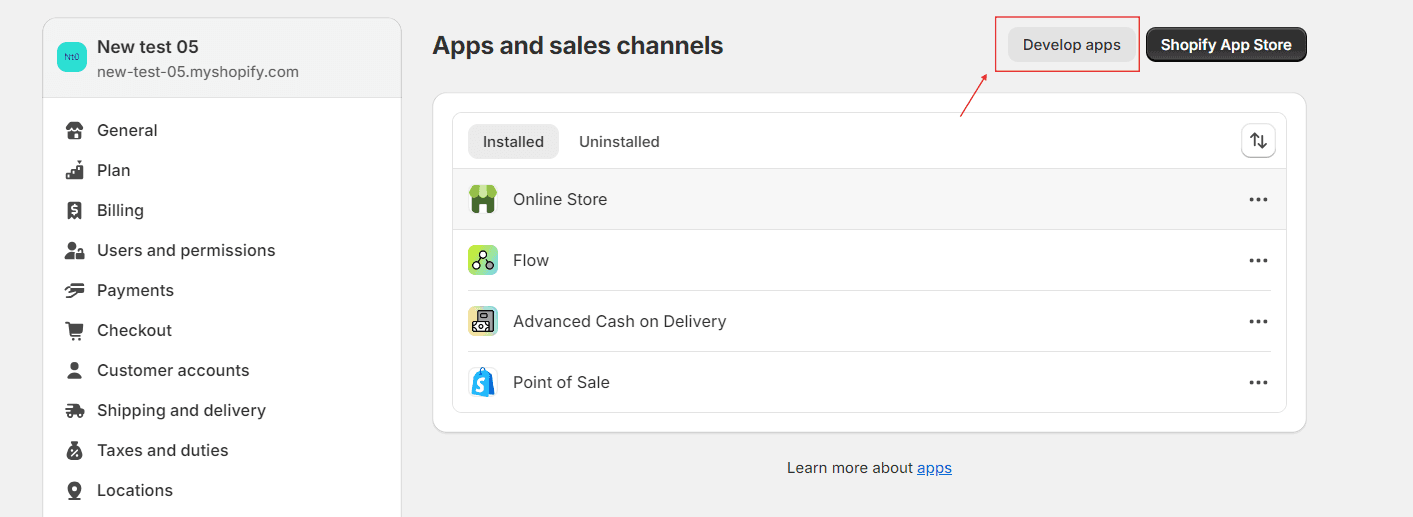
3. Click Develop Apps
Next, click Develop Apps to create a new app.
4. Click Allow custom app development
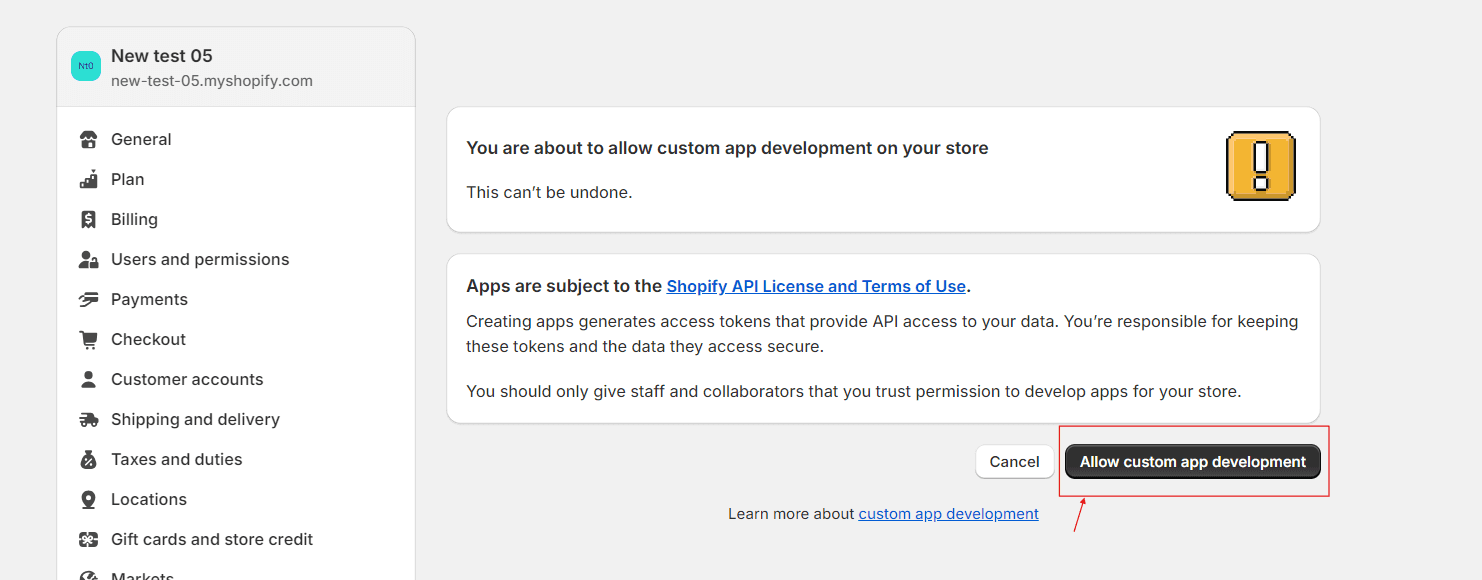
Next, click allow custom app development to create a new app.
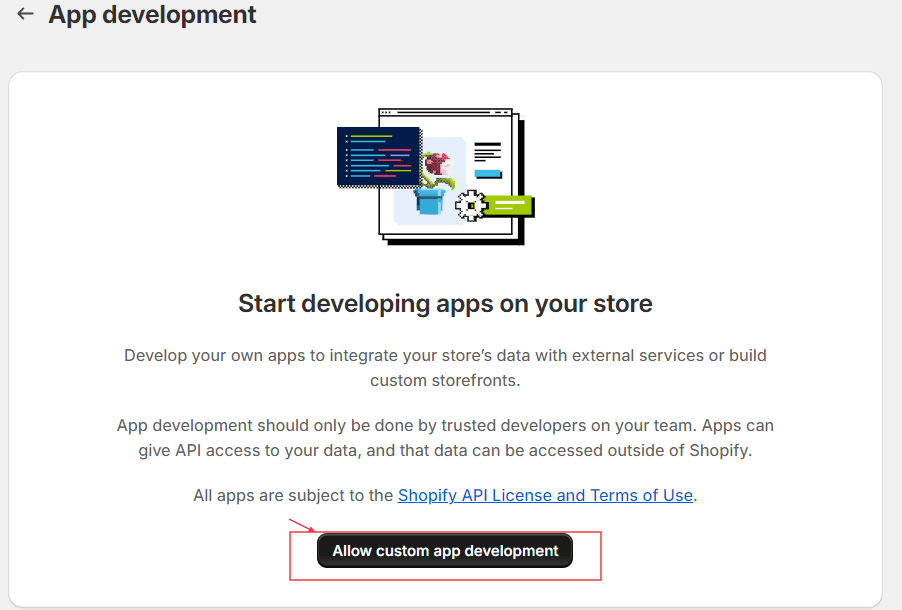
Then give one more permission to install the application if asked.
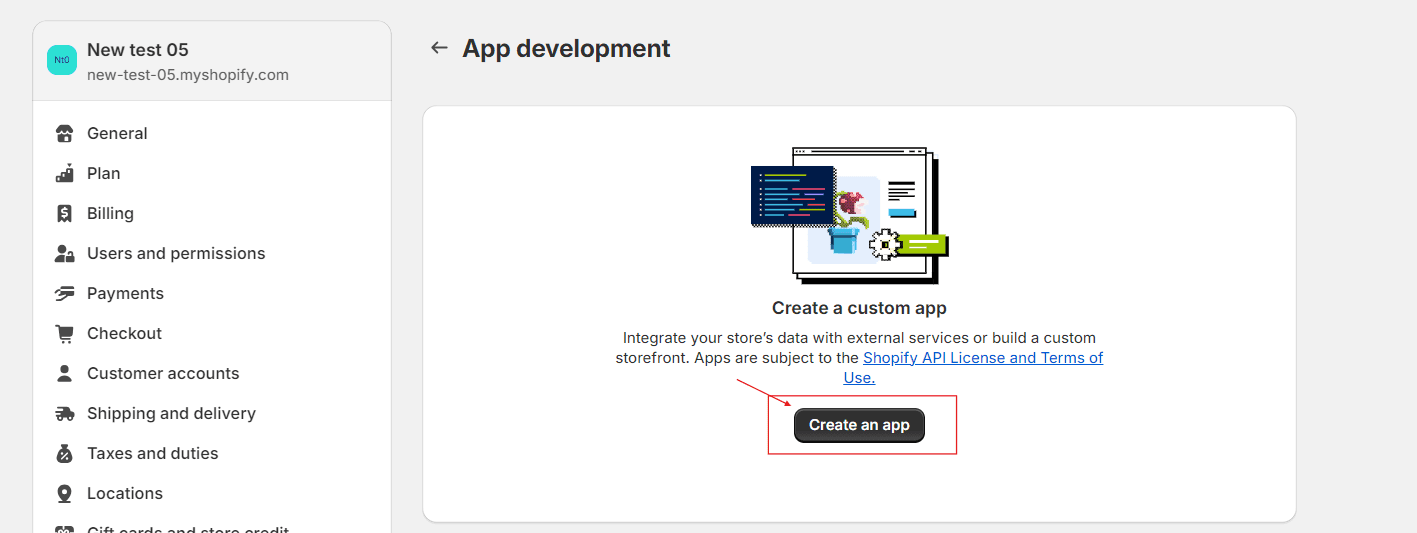
5. Next, click 'Create an App'
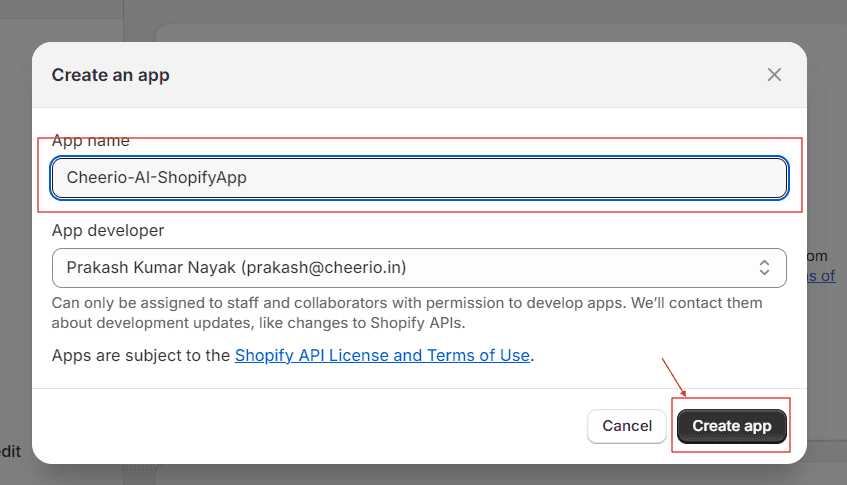
6. Name your App
Name your app as Cheerio-AI-ShopifyApp & enter your preferred email under the App developer email.
Once you add these details, the Create App button will be enabled. Press Create App to create your app.
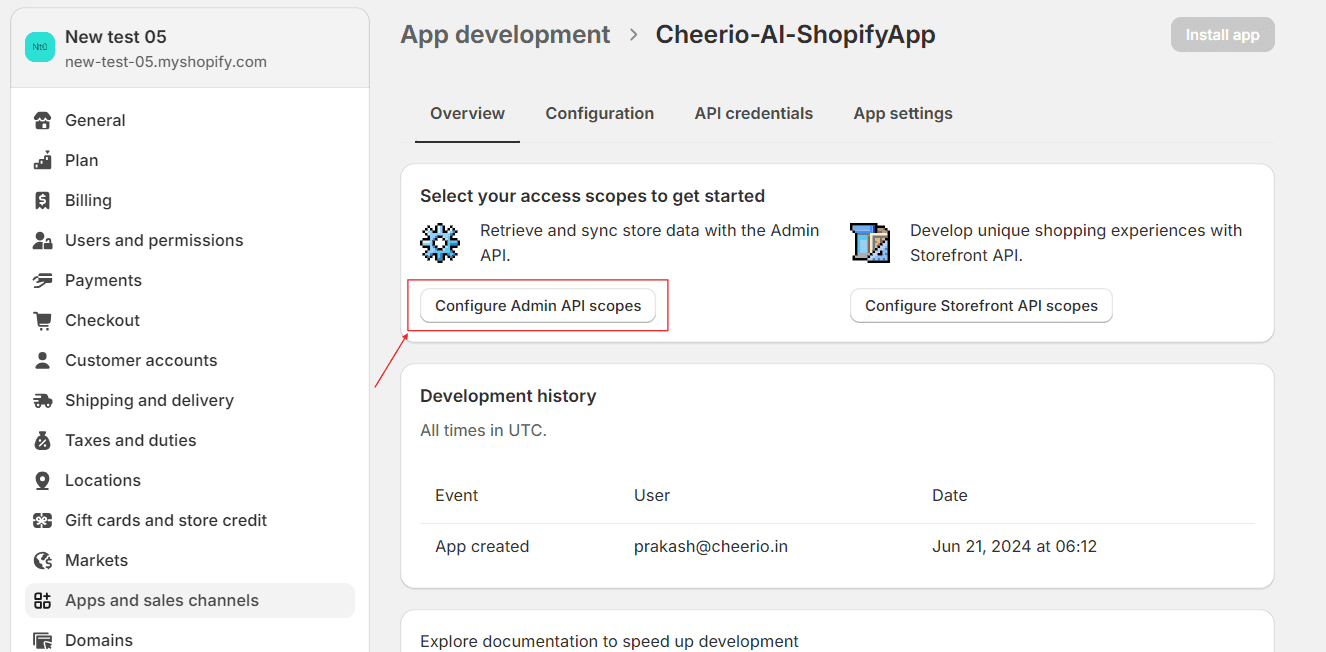
7. Click 'Configure Admin API scopes' in Overview
8. Scroll down to Orders & tick the options shown in the images
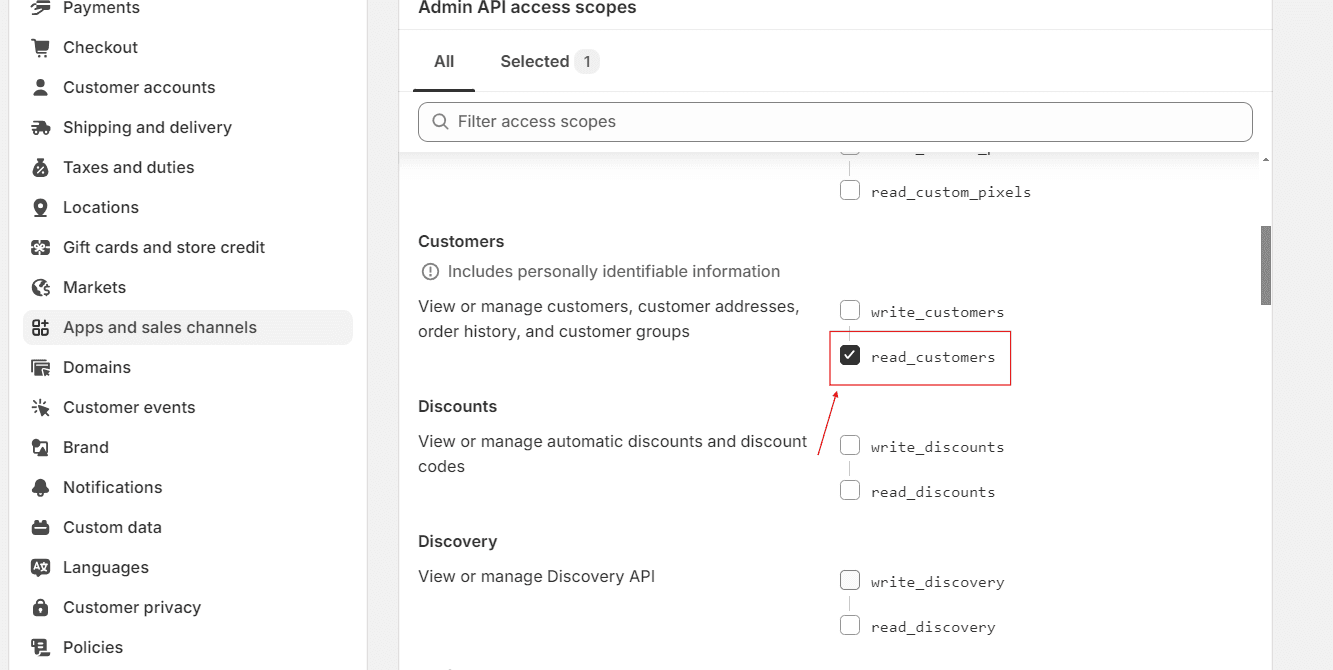
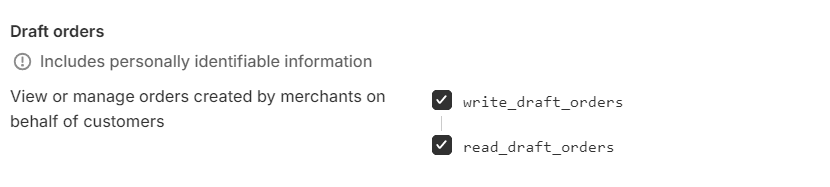
In Configuration, scroll down to Orders & give permission for 'write_orders'. 'read_customers', 'read_orders' & ‘read_products’


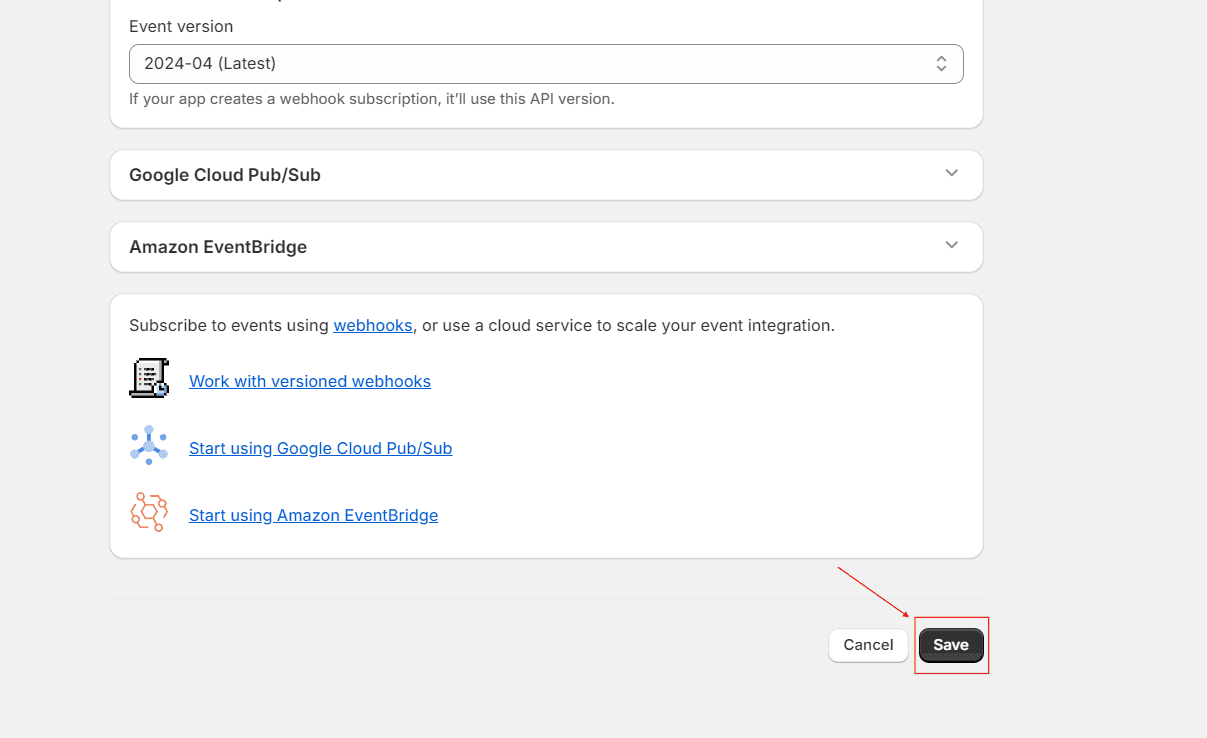
Scroll down to the bottom and Click the Save button to proceed.
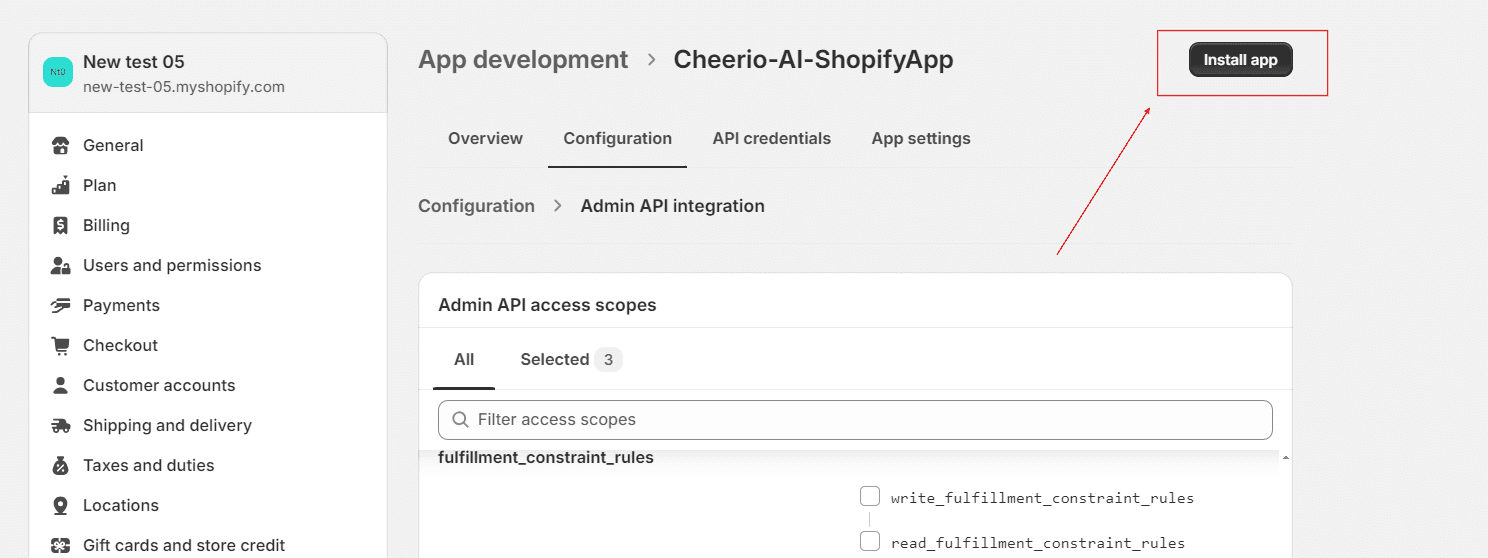
9. Click 'Install App'
Next, go to the top section & click on Install app.
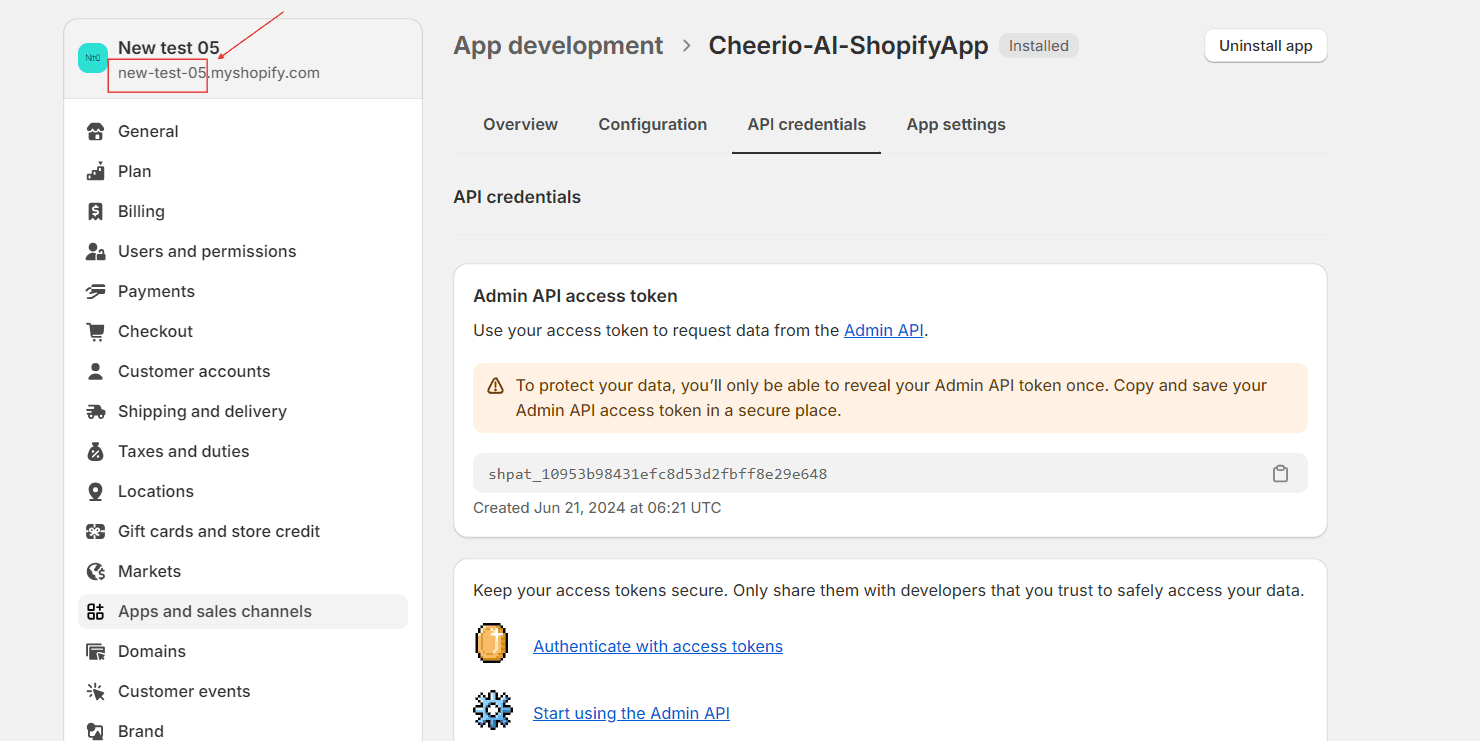
10. Copy the Store Name, Access token, and API Secret Key
Copy the store name as shown in Figure.
Kindly collect the Name from the domains.
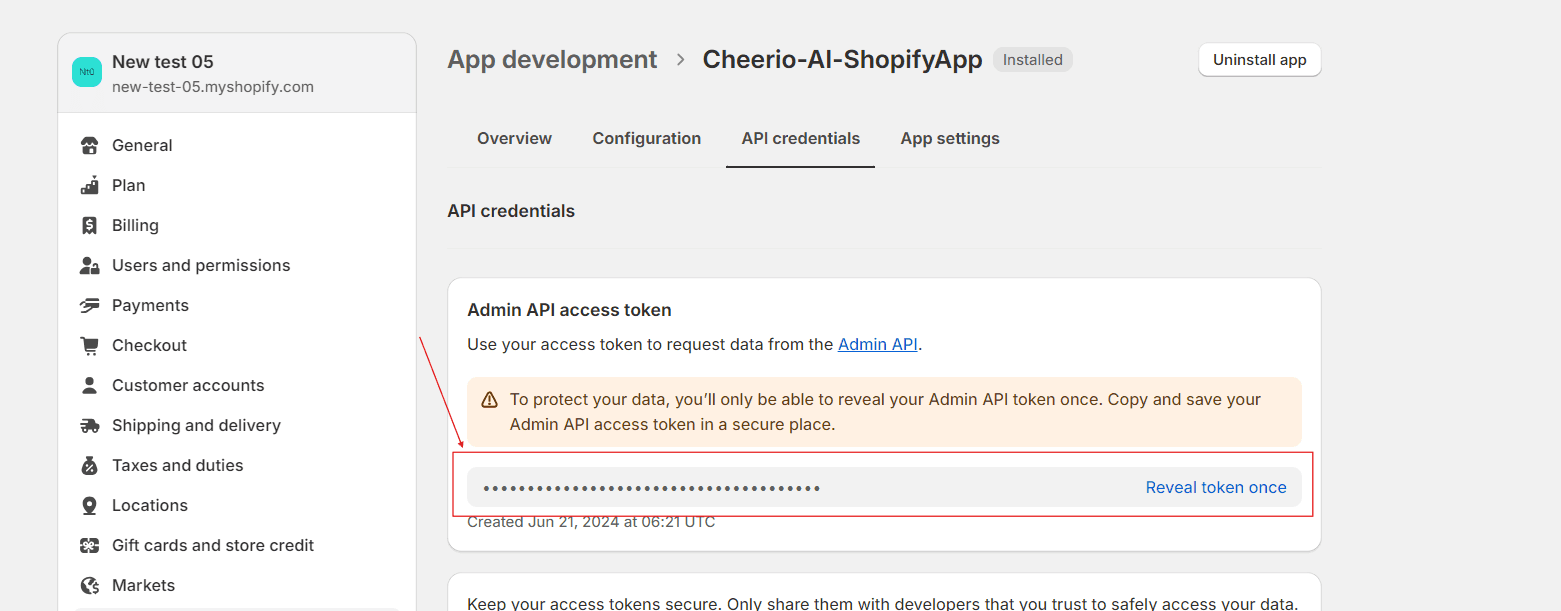
Click on the Reveal token once and Copy the Access Token.
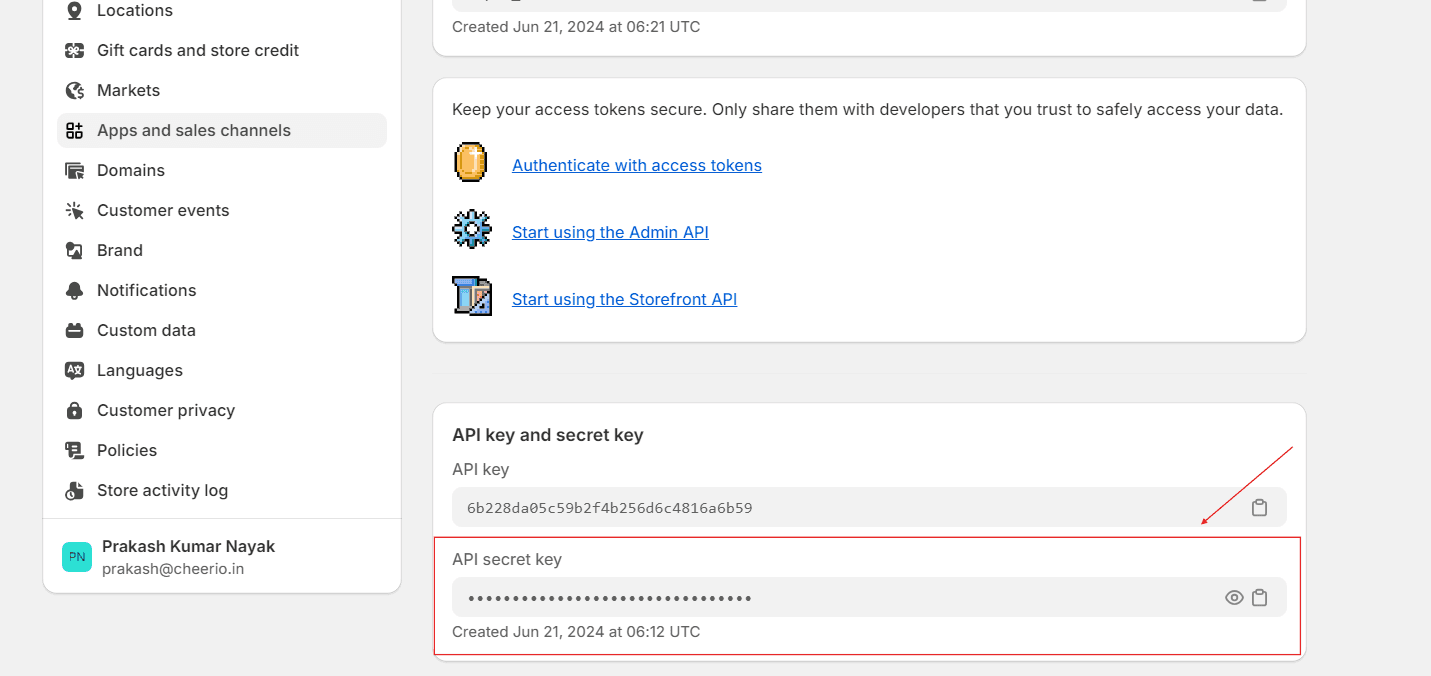
If you're a Basic Shopify plan user, skip to Step 11 to copy the API Secret Key.
Otherwise, Go down and click on the copy option of API Secret Key
11. Copy the API Secret Key for the Basic Shopify Plan
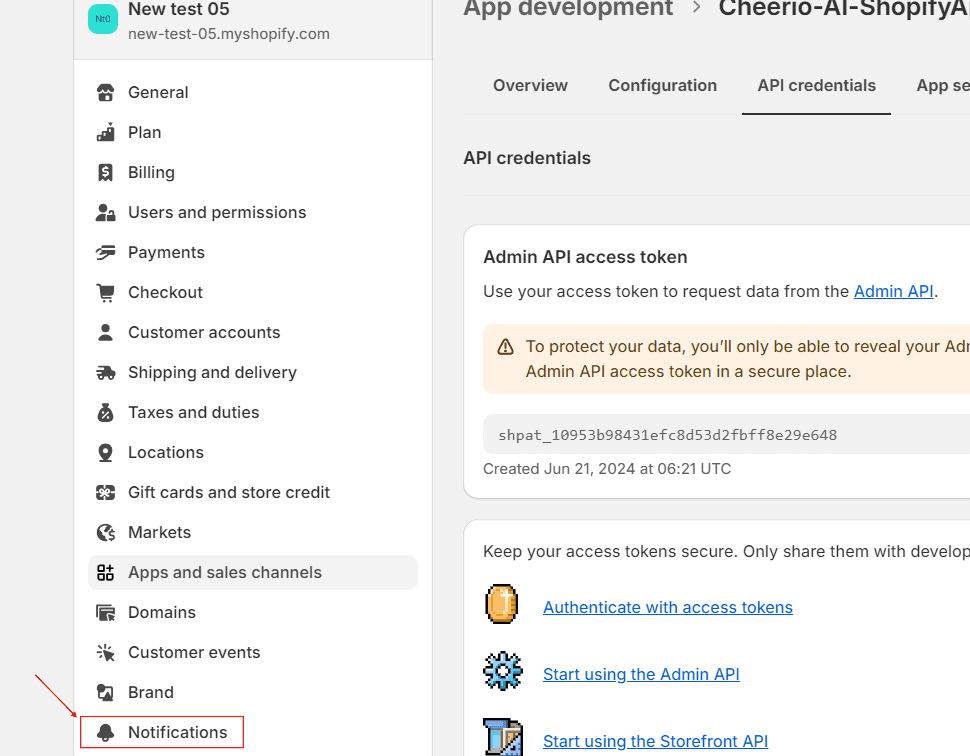
Go to the Notifications section and Click on it.
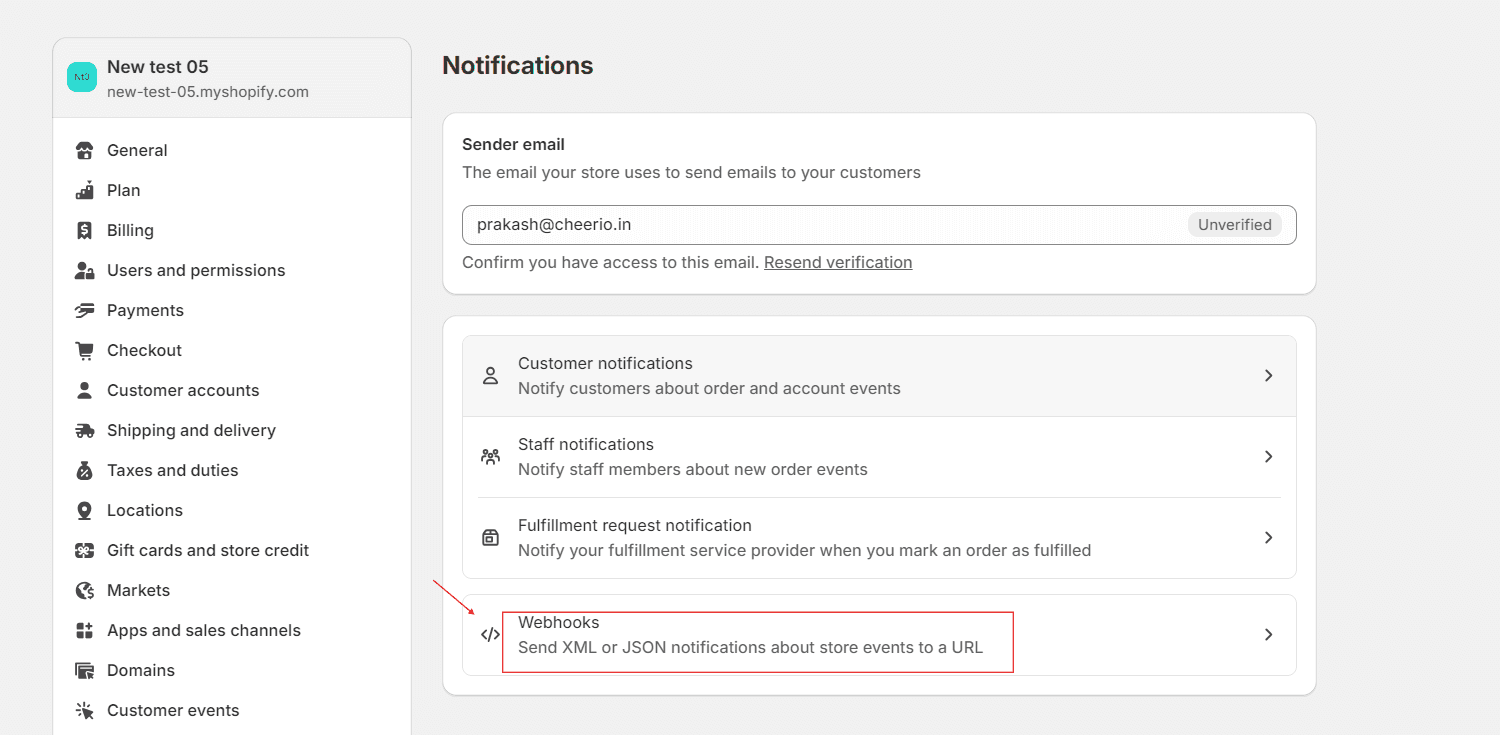
Then Select the Webhooks Option shown below in the image.
Copy the Key marked inside the red box as your API Secret Key
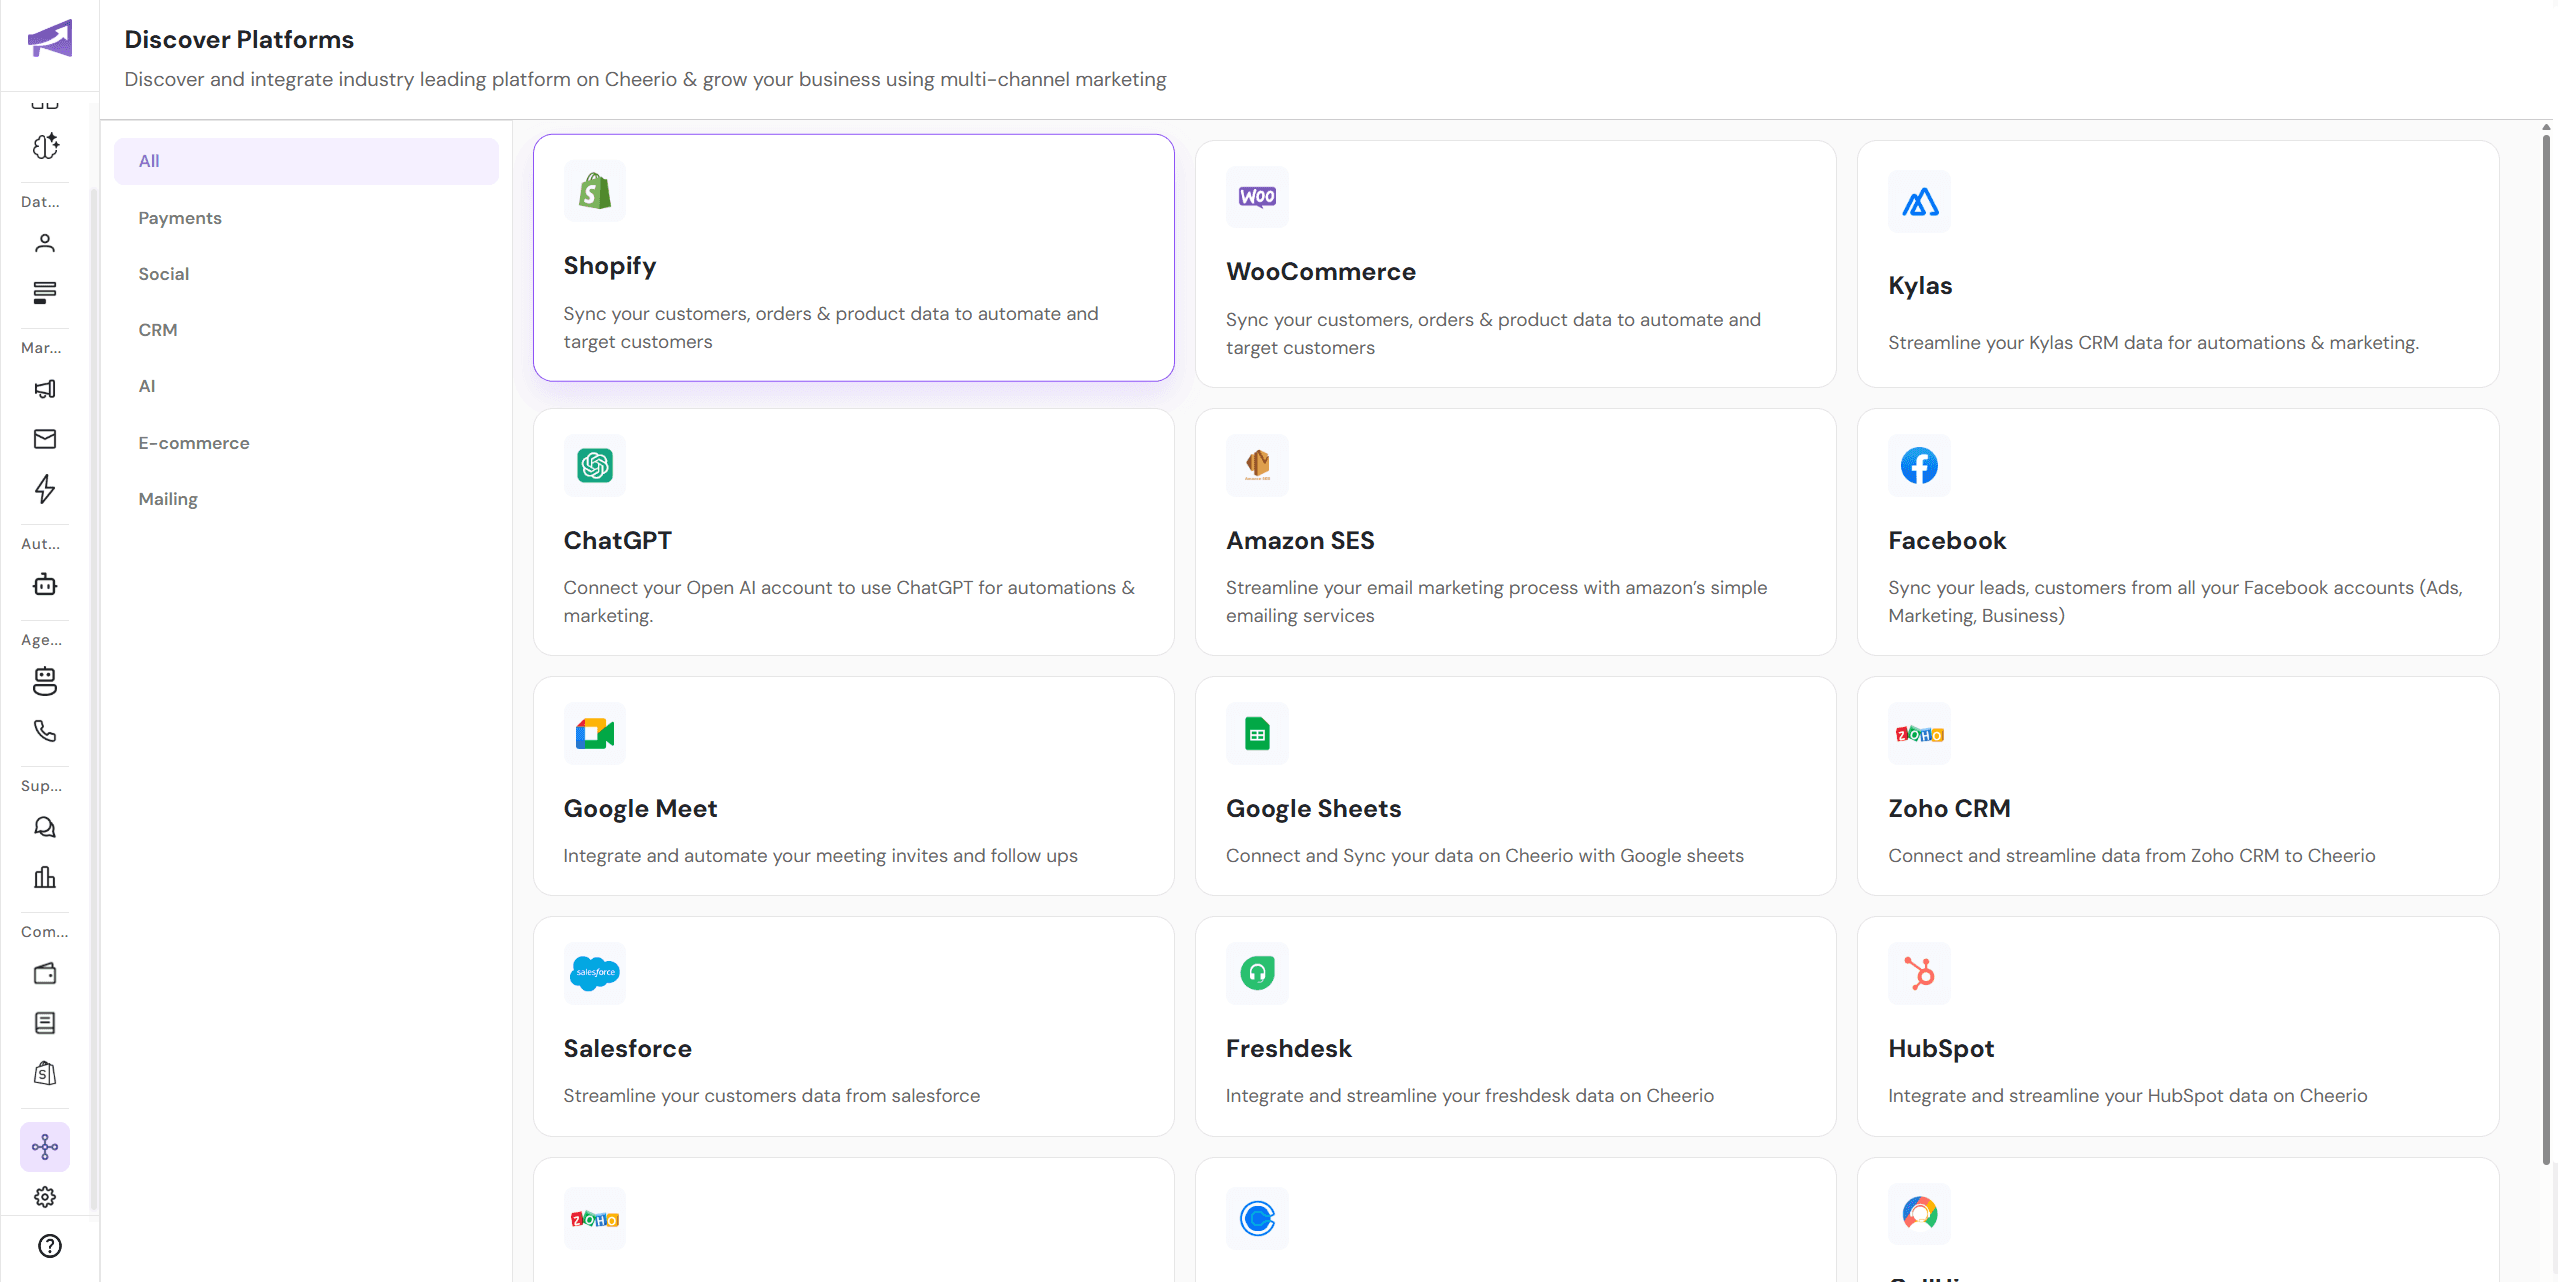
12. Go to the Cheerio AI, navigate to the Discover Platforms page and select Shopify
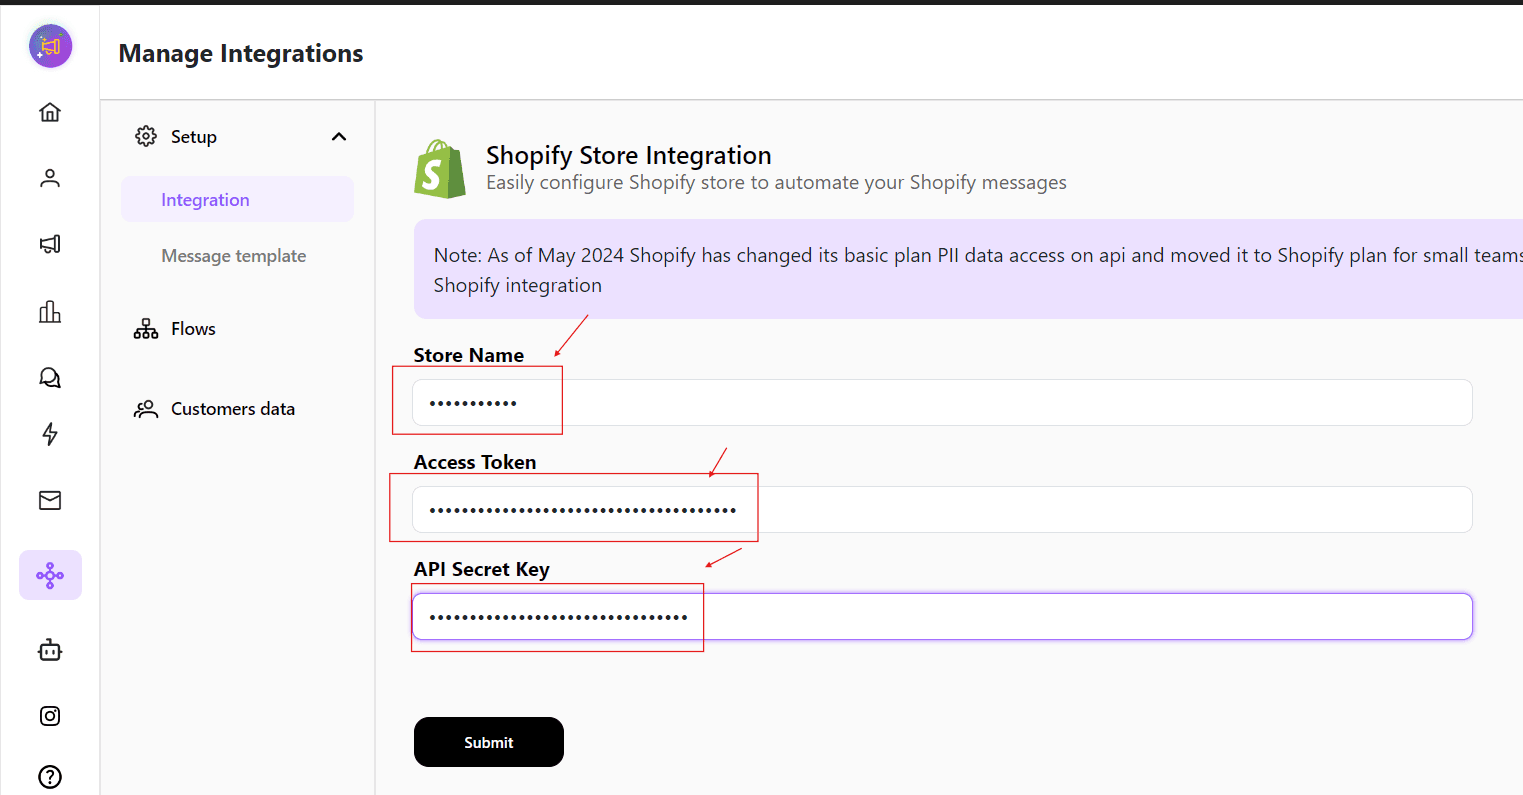
13. Then fill in the details copied previously and Click on the Submit button to connect with the Cheerio-AI app
14. Return to the Shopify Store and Select Notifications from the settings menu.
Then Select the Webhooks Option shown below in the image.
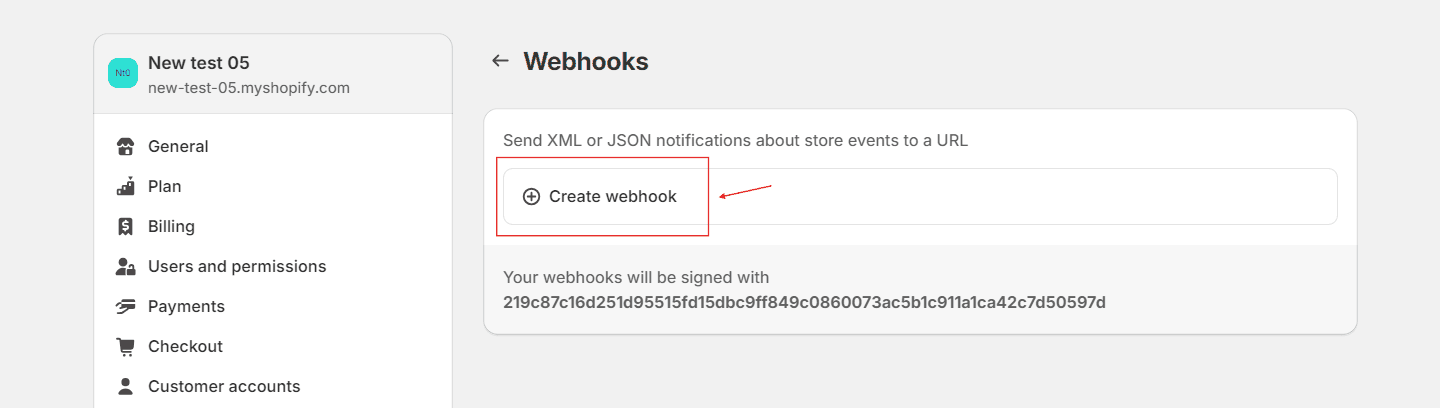
15. Create the Webhooks.
Click on the Create webhook button shown.
Then Enter the details shown and provided by the Cheerio Team:
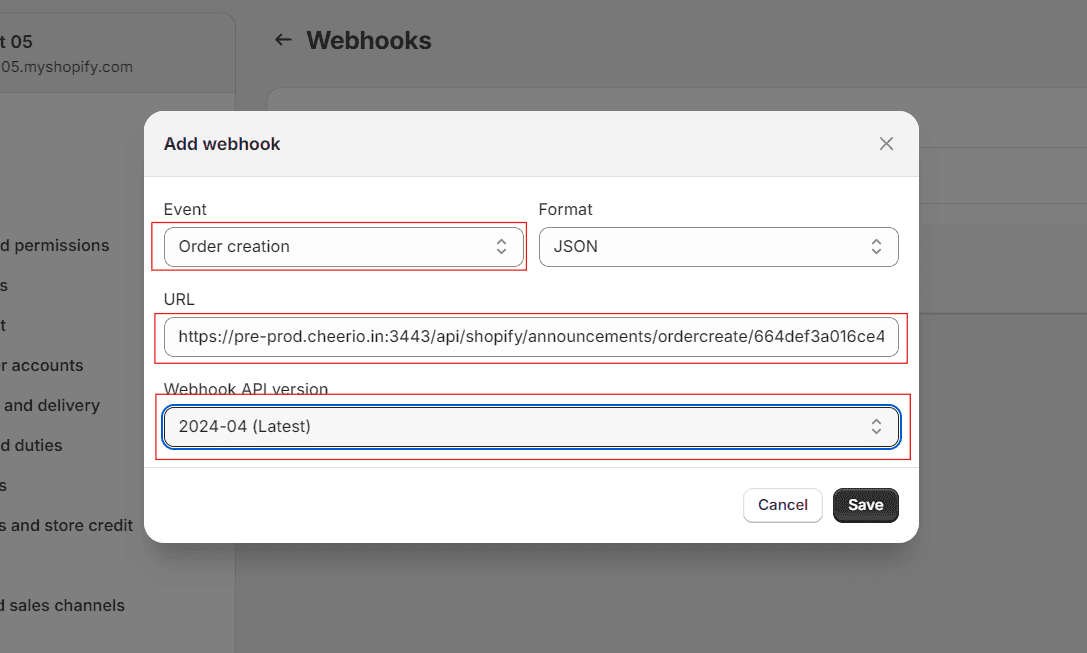
Events to be Captured are:
Order creation
Order fulfillment
Order cancellation
Checkout update
Checkout creation
Draft Order Creation
Draft Order Update